Oracle Database 18C Download and Installation - step by step
In this tutorial, We will learn how to download oracle database 18C and how to install Oracle Database 18C on Windows 10 Enterprise for research and education.
Minimum Hardware and Software Requirements for Installing Oracle 18c Database:
The minimum hardware requirement for installing Oracle Database 18c on Windows 10 is:RAM: 2 GB of RAM
Empty Space: 10 GB of empty space on your hard disk drive
Swap Memory: 16 GB SWAP (virtual memory) space if RAM is more than 16 GB. If RAM is less than or equal to 16 GB then 1 times the size of the RAM
Processor: A processor based on either Intel EM64T or AMD64 Architecture
Resolution: Minimum screen resolution of 1024 x 768 pixels.
Oracle Database 18C Download in windows:
Step 1: Open Oracle website
First download Oracle 18C software for Windows from official oracle website.https://www.oracle.com/technetwork/database/enterprise-edition/downloads/index.html
You should sign to download the .exe set up files.
Step 3: Accept License Agreement
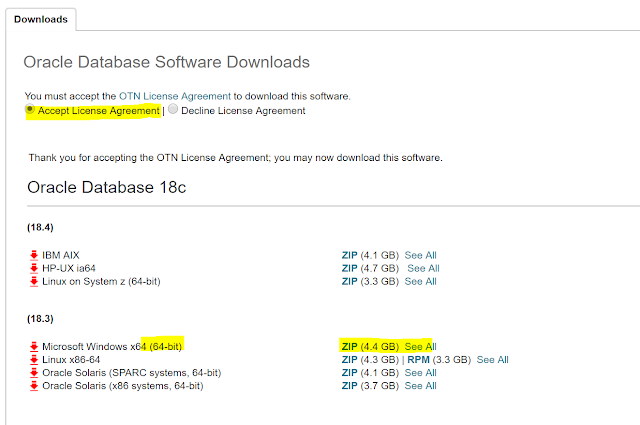
We must accept "Accept License Agreement" by selecting radio button on top of the download page.
Below image is for step 1,2, and 3.
Step 4: Click on the Download version.
For Windows version, 18C is available only 64 bit operating system as similar to the 12c version. Download from the below links.Download Microsoft Windows x64 (64-bit) ZIP (4.4 GB)
Download Linux x86-64 ZIP (4.3 GB) | RPM (3.3 GB)
Download Oracle Solaris (SPARC systems, 64-bit) ZIP (4.1 GB)
Download Oracle Solaris (x86 systems, 64-bit) ZIP (3.7 GB)
Oracle Database 18C Installtion step by step:
After downloading the zip file, we will learn now how to install the Oracle 18c.
Step 5: Extract .zip file
A zip file will be downloaded when we click on the above links in Step 4. Extract the zip folder for exe file.
This zip file size will be around 4GB and after extraction, it would be around 9GB. Quite bigger in size.
Step 5: Run as Administrator
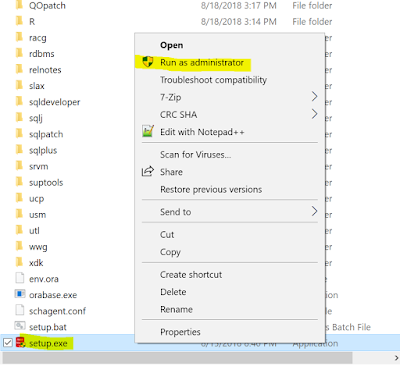
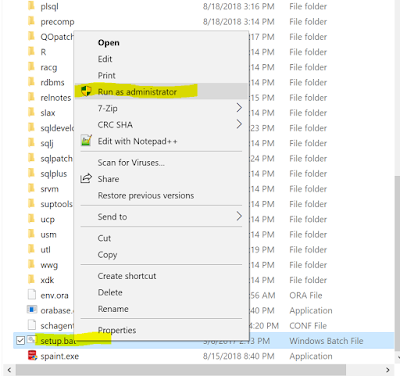
Run the setup.exe or setup.bat file for windows OS. Both files will do the same job in windows. Click on one of them.
Once click on setup.exe file then Launching wizard window appears as below.
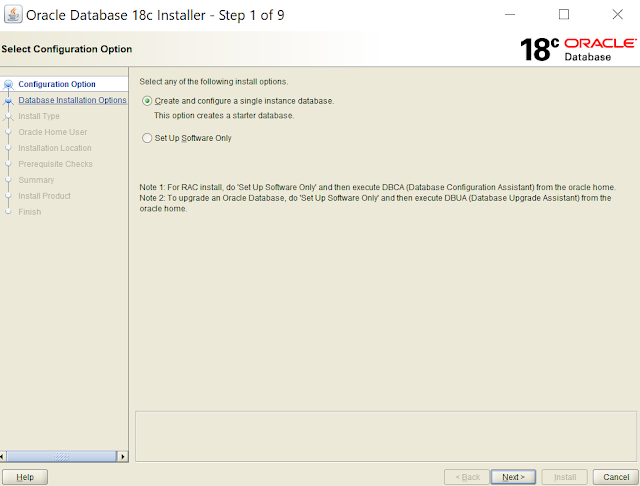
Step 6: Configuration Options
Select radio button for "Create and configure a single instance database" and click on next button.
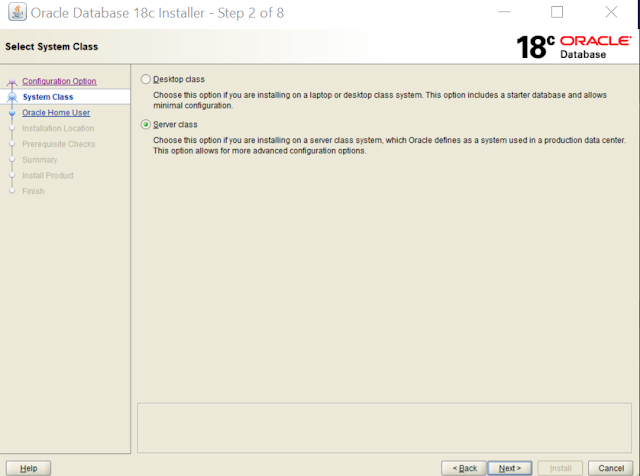
Step 7: System class
Select Desktop class - If you are installing on Desktop or Laptop for class and practice purpose. This has limited configurations.
Select Server class - If you are installing on production server. This has advanced configurations.
Select which ever class is applicable for you and then click on next button.
Step 8: Install Type
Select Typical install - for basic
Select Advanced install - with advanced selections such as different passwords for the SYSMAN, SYSTEM AND DBSNMP accounts.
Click on next.
Step 9: Oracle home User
Click on the "Create new windows user" radio button and provide the username, password and confirm password.
Password and confirm password should be same.
After providing the required details, click on next button.
Step 10: Typical Installation
Provide the all details such as Oracle base location, Database file location, Global database name, its password.
Select check box "Create as Container database" and this is mandatory.
Click on next button.
Step 11: Prerequisite checks
This will check now the following.
Physical memory
Available Physical Memory
Swap size
Free Space
Step 12: Summary
It will show us the Summary as in below image and click on install button.
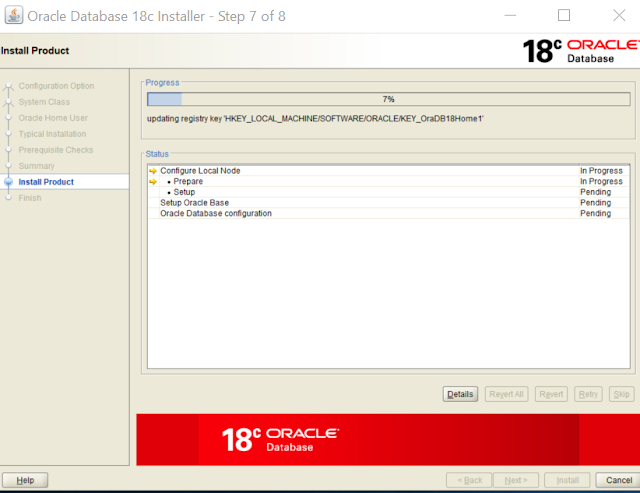
Step 13: Installation Process
After installation success next need to verify the connectivity.
Paste the URL "https://localhost:5500/em" in browser.
You can use Toad or Oracle SQL Developer.
Host: localhost
Port: 1521
SID: orcl







0 Comments